Sharp thinking - changing ride on lawn mower blades

Sharp mower blades encourage greener, fuller, healthier lawns to grow because the grass can heal quickly from a clean slice. Dull blades just rip the grass to shreds leaving the finish rough and the grass stressed out. It also helps cut mow time because you’re not having to repeat badly mown areas. Here’s a quick rundown of when and how to go about changing the blades on your ride-on mower.
There are many benefits to buying a mower from OMC. Download your free document now to find out what they are.
How often do they need sharpening?
About twice each season is best, once at the start and in the middle; more often if you mow over hard debris like sticks or rocks, etc, or if you live in a coastal or similar area where soils have a higher sand content which is more abrasive. You can spot the work of dull blades by looking for unevenness in the cut and/or inspect the grass for ragged and torn tips.
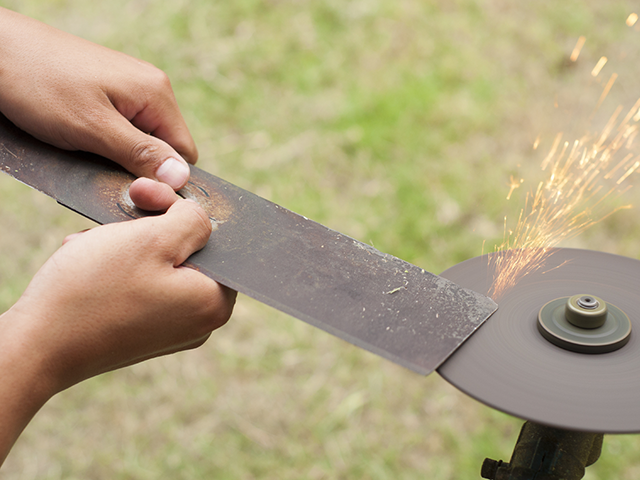
To sharpen or replace?
If it’s possible to sharpen you can use a hand file or angle grinder; the latter is much faster but harder to control and you might overheat the blade and wreck it. To get the longest lasting edge, sharpen from the top side of the cutting edge. Don’t go too sharp or it’ll dull much quicker. You’re aiming for about the sharpness of a butter knife.
Blades need replacing when:
- they’re bent or warped
- there are chips or dents in the cutting edge
- they’re corroded
- the trailing edge is thin (this is the edge opposite the cutting edge) – particularly common in highly abrasive soils
If you’re not sure, compare your old blade to a new one. You’ll easily spot if they just need a sharpen up or are no longer sufficient.
Can you do it yourself?
Sharpening the blades on a rotary mower is a piece of cake because you can simply flip the mower over and remove the one or two blades it has. A ride on mower is a bit different. Not only does it have more blades that are more complex, you need to be able to get at the blades first, which are underneath a very heavy piece of machinery. For this you’ll need jacks and steady supports.
Safety first
Always start by removing the spark plug so there’s not even a remote change the blades will move.
Also, replace like for like. Don’t try and install mulching blades where there weren’t any before, for example.
Mark the blades
Spray the blades on one side so you know which way they go back in. And mark them so you know where on the mower then went (ride ons tend to have multiple blades). You’d be surprised how easy a mistake it is to make.
What about mulching blades?
This can be way trickier as they sometimes have longer or curved cutting edges. This is one probably best left to a professional.
Balance the blade
Before reinstalling, check the blades are balanced so they doesn’t cause any vibrations or worse, ruin the blade shaft or bearings. To do this, hang it on a nail like a propeller. If one side falls, that means it’s heavier and needs more taken off.
Tighten the bolts
It’s pretty hard to overtighten the bolt and one that’s not tight enough causes all sorts of problems. However – this rule does not apply to Walker mower blades, and other brands, where the blade is required to be tightened to a particular torque setting to avoid gearbox damage. Always check the owner’s manual to see if a torque setting is specified – and if this is the case, you may need to get yourself a torque wrench. These cost between $80-160 depending on quality, and are available from many automotive or tool stores.
Turn to a pro
For efficient and quality service or repairs such as blade sharpening, look no further than OMC. We have 5 full time mechanics available to help, and a fully stocked spare parts department in case a replacement is needed.